Part A - Components You Can Prepare Ahead
Make the Lemon Curd (1–2 Days Ahead): Whisk egg yolks, sugar, lemon juice, and lemon zest together in a medium heavy-bottomed saucepan. Cook over medium-low heat, stirring constantly with a wooden spoon, until the mixture thickens and coats the back of the spoon (about 5–7 minutes). Do not let it boil or the eggs will scramble. Remove from heat and stir in the butter, one piece at a time, until fully melted and smooth. Strain through a fine-mesh sieve into a bowl. Press plastic wrap directly onto the surface (this prevents a skin from forming) and refrigerate until cold and thick - at least 2 hours, ideally overnight.
Make the Honeycomb Toffee (Up to 2 Days Ahead): Line a baking sheet with parchment paper and grease lightly. Combine the sugar, water, and corn syrup in a medium heavy-bottomed saucepan over medium heat. Stir until the sugar dissolves, then stop stirring completely. Let the mixture boil undisturbed until it reaches a deep amber color - 150°C (300°F) on a candy thermometer, roughly 8–10 minutes. Watch carefully as it can burn quickly past this point. Immediately remove from heat and quickly whisk in the sifted baking soda. The mixture will foam up dramatically - this is the “honeycomb” effect. Pour immediately onto the prepared baking sheet. Do NOT spread or touch it. Let it cool completely until rock hard (about 30–45 minutes). Once cool, break or crush into small, irregular pieces. Store in an airtight container at room temperature.
Part B - Baking Day
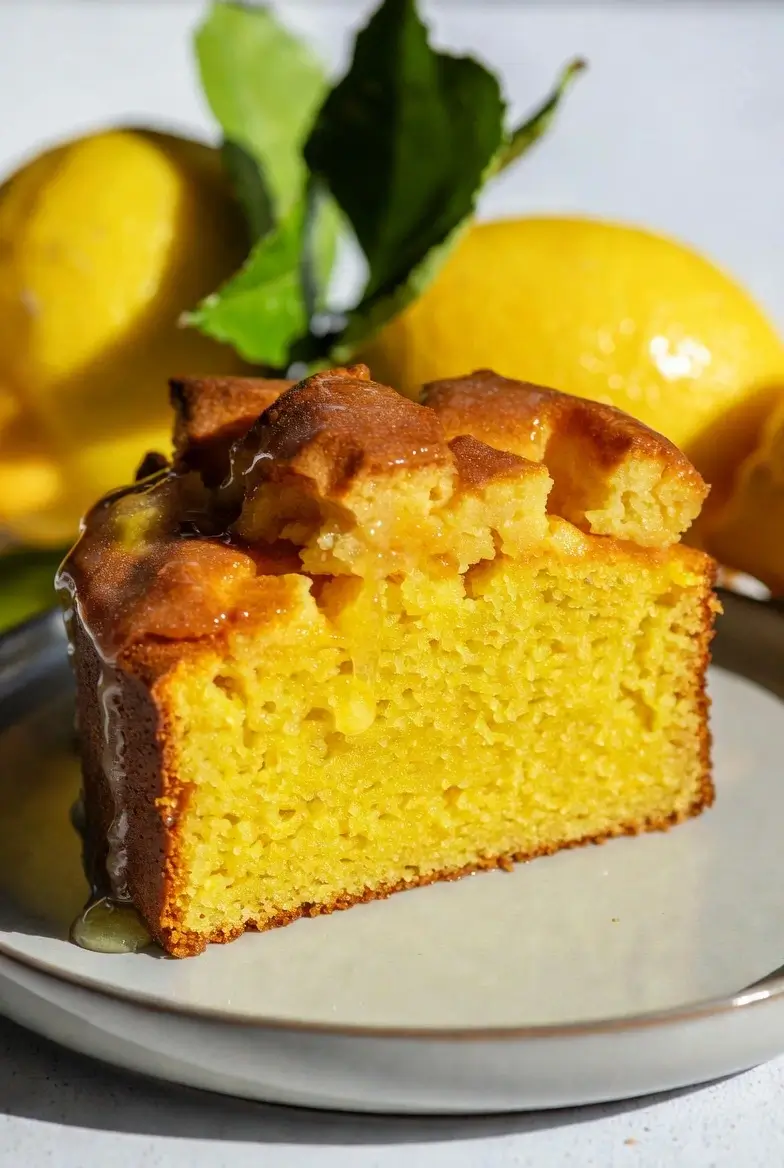
Bake the Lemon Cake: Preheat your oven to 175°C (350°F). Grease and line two 8-inch cake pans with parchment paper. In a medium bowl, whisk together the flour, baking powder, baking soda, and salt. In a large bowl, cream the softened butter and sugar with an electric mixer for 4–5 minutes until pale and fluffy. Add the eggs one at a time, beating well after each. Mix in the lemon zest, lemon juice, vanilla extract, and lemon extract (if using). Add the flour mixture in three additions, alternating with the buttermilk in two additions, beginning and ending with flour. Mix on low speed just until combined - do not overmix. Divide evenly between the two pans and bake for 28–32 minutes until a toothpick comes out clean. Cool in pans for 10 minutes, then turn out onto wire racks.
Soak with Lemon Syrup: While the cakes bake, heat the lemon juice and sugar in a small saucepan over medium heat, stirring until the sugar dissolves (2–3 minutes). Do not boil. While the cakes are still warm on the cooling racks, use a pastry brush to generously brush the lemon syrup over the tops and sides. Let it soak in completely. This is the step that takes the cake from “good” to “addictive” - every bite will burst with bright lemon flavor.
Whip the Cream: In a large, chilled bowl, whip the cold heavy cream, powdered sugar, and vanilla with an electric mixer on medium-high speed until stiff peaks form (2–3 minutes). Do not over-whip or it will become grainy and butter-like.
Part C - The Grand Assembly
Build the Layers: Place the first cake layer (syrup side up) on your serving plate or cake board. Spread a generous, even layer of chilled lemon curd over the top. Dollop about ¾ cup of whipped cream over the curd and spread gently. Place the second cake layer on top. Frost the entire top and sides of the cake with the remaining whipped cream, using an offset spatula to create a smooth or rustic finish - whichever you prefer.
Apply the Crunch: This is the moment of truth! Just before serving (no more than 1–2 hours ahead), take your crushed honeycomb toffee and press generous handfuls all over the top and sides of the cake. The toffee should cover the cake thickly, creating that legendary shattering crunchy coating. Pat it gently so it sticks to the cream. Some pieces will fall - that’s part of the charm.
Garnish and Serve: Add candied lemon slices, fresh blueberries, lemon zest curls, or edible flowers on top for a stunning presentation. Slice with a sharp knife and serve immediately. Every slice should reveal the beautiful layers: golden toffee crunch, white cream, yellow curd, and lemony cake.